Your thick-walled, multi-story home presents a serious challenge for Wi-Fi signals. Traditional routers simply can’t push through dense plaster, brick, or concrete walls that span multiple floors.
You’ll find dead zones in bedrooms, weak signals in basements, and frustrating dropouts as you move between levels.
But mesh networks change everything. They create a web of interconnected nodes that work together, passing your devices seamlessly from one access point to another.
The secret lies in strategic placement and understanding how these systems actually penetrate stubborn architectural barriers.
Understanding Mesh Wi-Fi Technology for Challenging Home Layouts
Dead zones plague traditional routers. Your single router can’t penetrate thick walls or reach distant corners effectively. Mesh Wi-Fi changes everything.
Think of mesh networks as teamwork in action. Multiple nodes communicate with each other, creating one seamless network throughout your home. Each node acts as both an access point and a repeater, spreading signals intelligently across every floor, every room, every stubborn corner where your old router failed.
Data flows like water, finding the best path. If one route hits interference, the system automatically switches to another node, maintaining your connection without interruption. The mesh network features automatic data rerouting to ensure consistent performance even when individual nodes experience failures.
You’ll walk from basement to attic, and your devices seamlessly jump between nodes, always connecting to the strongest signal available.
This architecture eliminates dead zones, covering up to 7,500 square feet with consistent, reliable Wi-Fi coverage.
Strategic Node Placement to Overcome Structural Barriers
Your mesh network’s power lies entirely in where you place each node.
Think strategically. Position nodes so they don’t broadcast through more than one thick barrier to reach each other. That’s your golden rule.
Place nodes in open areas, away from metal appliances and dense walls. Mount them mid-height between floor and ceiling for best coverage.
Never hide nodes inside cabinets or behind furniture—they need breathing room.
For multi-story homes, you’ll need one node per floor minimum. Stagger placement across levels rather than clustering on one floor.
That office behind two brick walls and a chimney? It needs its own dedicated node nearby.
Test dead zones after initial setup. Move nodes as needed. Your mesh system’s app will show signal strength, guiding your adjustments. Keep nodes within 50 feet of each other to maintain strong connections between units.
Optimizing Backhaul Connections for Maximum Performance

While strategic placement gets your nodes talking to each other, optimizing how they actually communicate—called backhaul connections—determines whether your network flies or crawls.
Choose a star topology. Connect each wireless satellite directly to your main router, avoiding daisy-chains that kill speed through signal degradation.
Dedicate the 5 GHz band exclusively for backhaul traffic. This prevents interference with your devices and maximizes performance through thick walls.
Ensure signal strength stays above -60 dBm between nodes. Position them for line-of-sight whenever possible, even if that means creative mounting locations.
Use DFS channels to dodge interference from neighbors’ networks. These channels offer cleaner airwaves for your backhaul connections.
Configure mesh parent settings on your main router only. Don’t enable mesh connect on wired access points—it creates unnecessary complexity. Remember that data capacity reduces by 50% for each wireless hop in your mesh network.
Equipment Selection for Thick-Walled Multi-Story Properties
Thick walls transform your equipment selection from simple preference into strategic necessity.
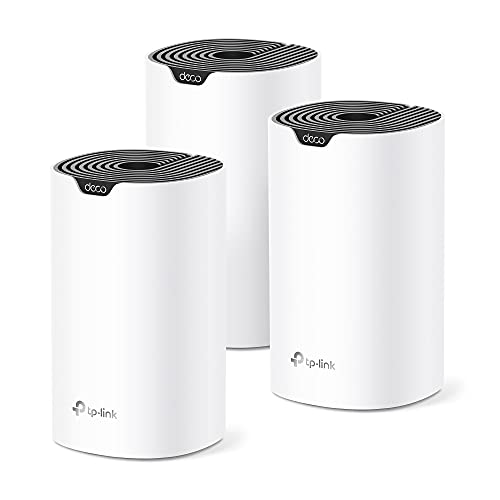
You’ll need systems that punch through concrete and brick with authority. Wi-Fi 7 standards like the Netgear Orbi 370 deliver the power you’re after.
The ASUS ZenWiFi BQ16 Pro uses quad-band technology, creating multiple pathways through dense materials.
Don’t overlook powerline solutions. The Devolo Magic 2 Wi-Fi 6 bypasses wall penetration entirely, using your home’s electrical wiring as the backbone. Smart choice for older buildings.
Look for dual-band systems emphasizing 2.4 GHz frequencies—they penetrate walls better than higher bands. Your mesh nodes need multiple high-gain antennas and robust processors.
Plan for a minimum of 2000 square feet of coverage. Ethernet ports on nodes offer wired backhaul options, your insurance against stubborn thick walls. Unlike traditional extenders, mesh systems offer unified networks with minimal impact on bandwidth.


Configuration Best Practices for Seamless Network Coverage

Getting your equipment won’t guarantee success—smart configuration separates the pros from the frustrated. Start with the 5 GHz band for mesh backhaul, then assign static channels to root nodes. This reduces interference and maximizes speed.
Position your nodes strategically. Central, open areas work best—away from thick walls and appliances that block signals. Keep wireless hops to a maximum of two between any node and your wired root. More hops mean slower speeds.
Signal strength matters tremendously. Aim for -60 dBm between meshed nodes, never worse than -80 dBm for stable connections. Use DFS channels when available—they’re less congested.
Security comes next. Configure WPA3 encryption with unique SSIDs. Create isolated guest networks for IoT devices. This prevents unauthorized access to your main network while maintaining convenience for visitors. Cluster APs into groups with no more than four Remote Nodes per Root Node for optimal performance.
Expanding Your Mesh System Based on Coverage Needs
Once your mesh network runs smoothly, expansion becomes inevitable as needs change and coverage gaps appear.
You’ll add nodes based on real usage patterns, not guesswork. Test signal strength regularly. Walk through your home with your phone, checking speeds in every room.
When dead zones emerge, place new nodes halfway between your router and problem areas. Don’t overcrowd. Space them fifty feet apart, adjusting for thick walls that block signals.
New nodes integrate automatically through your mesh app. You won’t need complex setup procedures. Simply plug in, follow prompts, and watch coverage expand. The interconnected nodes communicate with each other to route data effectively throughout your expanded network.
Consider Ethernet backhaul for thick-walled homes. It reduces signal loss between nodes, creating stronger connections.
Wireless backhaul works too, but requires closer placement for reliable performance in challenging environments.
Troubleshooting Signal Issues in Dense Construction Homes
When concrete walls and metal lath block your Wi-Fi signals, troubleshooting becomes essential for reliable coverage. You’ll need strategic placement. Position routers away from metal surfaces, ceramic tiles, and thick concrete barriers. These materials kill signals fast.
Test doorways first. Signals travel through thinner barriers better than solid brick walls. Move your mesh nodes around. Find the clearest paths between devices.
Switch to wired Ethernet backhaul connections when possible. This bypasses physical obstacles completely, creating rock-solid mesh communication. Consider powerline adapters like the Deco PX50 if your electrical wiring shares circuits throughout the house.
Dense materials absorb Wi-Fi waves, so you’ll constantly fight signal loss. Tri-band systems with dedicated backhaul frequencies help separate traffic, maintaining stronger node connections even through challenging construction materials. Higher frequencies like 6 GHz provide faster speeds but penetrate obstacles less effectively than lower bands.
Testing and Fine-Tuning Your Multi-Floor Mesh Network
Testing your multi-floor mesh network requires systematic measurement, not guesswork. You’ll need tools like iPerf3 to check throughput and latency across every room.
Start by measuring signal strength in dBm. This shows where dead zones lurk behind thick walls. Walk through your home with a phone or laptop, testing speeds at different distances from each node. Pay attention to roaming time as you move between floors. Your devices should switch nodes seamlessly, without dropped connections or long delays.
Test with multiple devices running simultaneously – stream video upstairs while someone games downstairs. This reveals how your network handles real-world traffic loads. Consider testing across multiple frequencies, including 2.4GHz, 5GHz, and 6GHz bands to ensure optimal performance on each.
Create heatmaps to visualize coverage gaps. Adjust node placement based on these results, moving units closer to problem areas until signal strength improves consistently throughout your multi-story space.
Final Thoughts
You’ve built your mesh network foundation. Now test it daily. Walk every room, check every corner. Move nodes when signals weaken. Add more units as your demands grow.
Dense walls can’t stop you when you’re strategic, patient, and methodical. Your multi-story house will hum with strong, reliable Wi-Fi from basement to attic.
Keep monitoring, adjusting, and expanding. That’s how you master mesh networking in challenging homes.